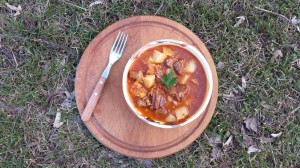
 I was recently contacted by Daniel at www.OutdoorDutchOvenCooking.info with this article and recipe for Hungarian Goulash. Dutch ovens are marvelous for cooking dishes like this. And Daniel adds in some great tips to help you get the absolute most taste out of your cooking. I hope you enjoy it.
We humans have this annoying flaw of resisting change and playing it safe, and that’s reflected in our cooking too, by sticking too often to traditional recipes passed on to us by our family and friends. How sad.
But it’s not just the actual recipe, the ingredients, that gives mind-boggling taste to this goulash (which is basically a stew) but also a well-known, yet under-used cooking technique that will bring out the flavor in the stew and make your guests swirl their tongues in their mouths, desperately looking for bits that have been caught in their teeth, so they can enjoy this mouth-watering stew a little further. (Yes, it can be that contagious).
So, without further ado, let’s look at the recipe first and then tackle this cooking technique that should be the standard for every stew you make from now on.
The Ingredients
The ingredients presented here are meant for a 10-inch Dutch oven and results in about 2-3 servings. If your Dutch oven is 12 inches, add 50% more of each ingredient, and if it’s 14 inches, double the quantity of the ingredients. The ingredients are listed in the order in which they’ll be used.
3 tablespoon olive oil 1 pound beef chuck or pork (shoulder or butt), depending on what you like more 2 onions, diced 1 carrot, grated 1 small celery root or a piece of celery root, grated 1 red bell pepper, minced 3 garlic sleeves, minced 1/2 teaspoon caraway seeds 1 teaspoon sweet paprika 4-5 cups warm water or stock 2 bay leaves ½ cup tomato paste 2 potatoes, chopped Salt Black pepperPreparation
1. Pour the oil into the Dutch oven and pre-heat it by using half of the required coals. After a few minutes, add remaining coals. When the oil is heated, add beef or pork and brown on both sides for about 5 minutes each or until a really deep brown crust is formed. Remove, place on a plate and chop into smaller pieces of about 1 inch.
2. Add more oil in the Dutch oven if necessary and add onions. Gently deglaze the fond left behind by the browned beef or pork with a wooden spoon or any other utensil that won’t harm the Dutch oven’s seasoning. Onions should turn brown. After deglazing is done, add the grated carrot, grated celery root and minced red bell pepper. Sauté until carrots become tender and lose their stiffness.
3. Make room in the center of the Dutch oven and add minced garlic and ½ teaspoon of caraway seeds. Sauté for about half a minute. Stir in quickly 1 teaspoon sweet paprika, then immediately add beef or pork pieces and warm water (enough to cover the meat). Add in bay leaves and tomato paste. Simmer while covered for about 45 minutes. If steam escapes, leave the lid ajar.
4. After 45 minutes, add potatoes. Cover again and let simmer for about 15-20 minutes. Replenish with warm water if necessary. Cook until potatoes are done.
5. Season with salt and pepper to taste, and serve with spaetzle or noodles.
An explanation
First, I don’t claim this is a true traditional Hungarian goulash recipe, because every man and his dog seem to have their own unique variation. However, it’s close enough and tastes very good. Also, the reason I sauté almost all vegetables is to unlock their flavor and to thicken the stew without using cream, as some people do.
And, no, not everything’s set in stone. Some people can’t stand bay leaves, others add more paprika, or even replace it with hot paprika. Some use red bell peppers, others use green, yellow, all or none. Some cut them regularly, although I like to mince them so they release more flavor as previously explained. Others add a little more carrot to sweeten the goulash.
Really, there’s nothing set in stone.
But probably everyone should do one thing: Brown the beef or pork. Let’s discuss that, shall we? But first, let’s look at a myth that I’ve seen even in a Dutch oven article on cooking.
High-temperature searing and the myth of “sealing in”
It was widely believed that searing and browning meats at high temperatures will close the pores of the meat and “seal in” its juices, therefore obtaining a much juicier piece of meat. It turns out (after repeated tests) that this is false. Furthermore, on close inspection, meat doesn’t have pores, but rather a network of fibers (which look like the cut end of a thick rope), so there’s nothing to be sealed.
In their quest to “seal in” juices at high-temperatures, cooks have achieved exactly the opposite effect; dry meats, because the high temperatures used made the juices evaporate into the air in a matter of minutes, just like my money when I go shopping with my significant other.
Browning, the gateway to divine flavor
Now that we know there’s nothing to be “waterproofed” and that high temperature browning can make our meat dry, why do we still want to brown meats? After all, we’re not cooking it – that’s the job of simmering. Well, we brown meats to bring out the best in them – that deep and sublime flavor we crave that makes us have withdrawals just by thinking of it.
But is there a way to do it so less juice is lost and more flavor is gained? After all, high temperatures can leave our precious meat dry.
There must be a way.
Well, it turns out you can get the best of both worlds by not cutting the meat into pieces, but, instead, browning it as a whole. This reduces the amount of surface that’s in direct contact with the Dutch oven, therefore less juice is lost.
So add a thin layer of oil, let it heat up really well (to about 300+ degrees), lay down the chunk of beef or pork, and resist the temptation to peak under. Meat needs a few minutes of “time alone” with the hot contact surface to really brown. Constant peaking makes it harder. You need to let it sizzle for about 5 minutes and then you can turn it over.
It’s only after the meat is browned on both sides, that you should take it out of the Dutch oven, cut it into pieces and continue cooking as described in the recipe. This is also more efficient because this way you don’t overcrowd the Dutch oven with smaller pieces which release more moisture and need more time and heat just to drive off that extra moisture.
Obviously, many have spotted that this means not all sides of the resulting smaller pieces will benefit from a brown crust. That’s true, but since this is a stew, the sides of the meat that are browned will release those flavors into the liquid and sail through the entire stew like Christopher Columbus through the Atlantic Ocean.
Also, since we need slightly higher temperatures than 300 for browning, we need to avoid water as much as possible, because water only heats up to 212 degrees. (Science class deja-vu?) So, make sure you pat dry the meat with paper towels so no moisture will be hindering us on our quest for the perfect goulash.
But this is just half of the story when it comes to browning. The other lies at the bottom of the Dutch oven.
The secret is in the “dirt”
As you’ve probably already discovered, browning leaves sticky dirt on the surface it was cooked, and who wants that dirt in their food?
I do.
You see, this “dirt” is actually called “fond” and is full of very rich flavors left behind by the proteins that are dissolved from the beef or pork and coagulate on the hot surface. It adds more to the flavor of a stew than people think it does, so don’t wash it off, but make use of it, by gently deglazing when adding onions and maybe another tablespoon of olive oil.
Once you taste a stew made using browning and the “dirt,” you’ll never go back. Trust me on this one.
So there you have it. A delicious, traditional Hungarian goulash recipe for your Dutch oven, together with some guidelines that, if followed, will keep your goulash on everybody’s lips, both literally and figuratively. But the goulash is just the beginning of an outdoor Dutch oven cooking adventure, and so I invite you to discover more about this magnificent world on my website www.OutdoorDutchOvenCooking.info.
I hope you enjoy that entertaining and educational article from Daniel. Check out his website for more Dutch oven cooking tips and recipes.


Recent Comments