In this next article in the Getting Started with Dutch Oven Cooking series, we'll discuss how to cook with a dutch oven. Cooking with a dutch oven isn't difficult. It's all about controlling the temperature. And you do that with charcoal briquettes.
Use Charcoal Briquettes
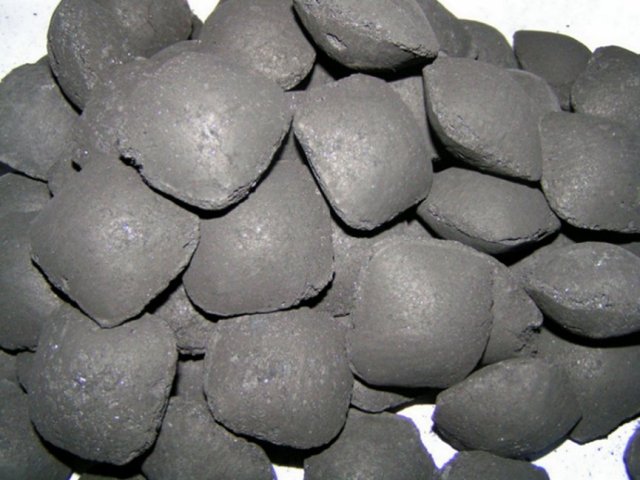 The easiest way to cook with dutch ovens is to use briquettes. You can cook right on a fire, but that takes a bit more skill. The coals from a fire just won't be as consistent as charcoal briquettes. When you are just getting started, use briquettes.
Use a good quality briquette. Kingsford briquettes are good and will last sufficiently long. Avoid the briquettes that are pre-soaked with lighter fluid like MatchLite. They won't last as long. Just use a charcoal chimney to get briquettes started.
How Many Briquettes Do I Use?
Always remember that you can always cook something little bit longer if the heat isn't quite enough, but you can't undo burned food if the heat was too much.
How Do I Place the Briquettes?
You'll generally want to have coals both underneath and on top of the dutch oven. If you are cooking soups, stews, or chilis, you'll want more underneath and fewer on top. If you are cooking bread, you'll need more on top and few underneath. For roasting meats, and cooking casseroles, vegetables or other general dishes, you'll want an even distribution.
For example, if you had a 12" dutch oven, use the following chart as a rough estimate for how many coals to put underneath and on top:
| Dish | Number of Briquettes On Top | Number of Briquettes Underneath |
| Soups, Stews, Chilis | 9 | 15 |
| Breads, Rolls, Biscuits, Cakes, Pies | 15 | 9 |
| Roasted Meats, Casseroles, Vegetable Dishes | 12 | 12 |
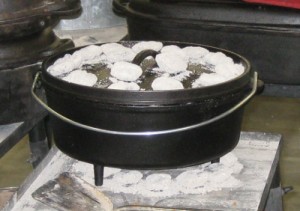 The best way to distribute the coals is to put them in a circle underneath the dutch oven, just in from the outside edge of the bottom of the dutch oven. And then put 1 in the middle. I just returned from seeing the Dutch Oven World Championship Cook-off and one of the presenters on the side said that he takes one coal and uses his tongs to split it into a couple pieces to use in the center.
On the top of the oven, space the coals evenly around the outside edge and then 2-4 around the handle in the middle. The heat will distribute through the dutch oven from the bottom and you'll get more even heating on the top.
Rotate, Rotate
If you put the coals in a circle underneath, you won't need to rotate the dutch oven, but if you choose otherwise, you should rotate the dutch oven by 90 degrees clockwise every 10 minutes. And in both cases, rotate the lid counter-clockwise 90 degrees every 10 minutes.
Rotating will help keep hot spots from heating a particular location in the dutch more than other locations, helping prevent burning of your food.
Stacking Dutch Ovens
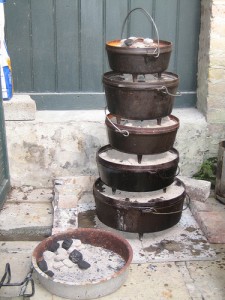 This is probably more for when you get more experience with dutch oven cooing, but one of the cool things about dutch ovens is that you can stack them, making more efficient use of the coals.
The coals on top of one dutch oven heat the top of that dutch oven, as well as the bottom of the dutch oven above it in the stack.
Stacking does take a bit more skill--more to worry about in terms of how many coals to use and rotating the dutch ovens in a stack is more involved. But is pretty impressive to see a stack of dutch ovens cooking an entire multi-course meal!
That should do it for actually cooking with the dutch oven. If you have any more suggestions, please add them in the in the comments below.
In the article, I'll talk about accessories that you'll probably want to have when you get started dutch oven cooking, and some that you can add along the way.
See below for all the articles in this series on Getting Started with Dutch Oven Cooking:
- Getting Started with Dutch Oven Cooking - What to Look For in a Dutch Oven
- Getting Started with Dutch Oven Cooking - Buying a Dutch Oven
- Getting Started with Dutch Oven Cooking - Seasoning a Dutch Oven
- Getting Started with Dutch Oven Cooking - Where to Cook With a Dutch Oven
- Getting Started with Dutch Oven Cooking - Cooking with a Dutch Oven
- Getting Started with Dutch Oven Cooking - Dutch Oven Accessories
- Getting Started with Dutch Oven Cooking - Easy Dutch Oven Recipes
- Getting Started with Dutch Oven Cooking - Cleaning a Dutch Oven
- Getting Started with Dutch Oven Cooking - Dutch Oven Cookbooks
- Getting Started with Dutch Oven Cooking - Online Dutch Oven Resources
Be sure to sign up for the Outdoor Cooking Magic Newsletter to be notified when the next article is ready!
Make sure to follow my on Twitter and Like Me on Facebook!



Recent Comments